I'll wager quite heavily that this happens to all who take rough boards and attempt to make them into something like this Chippendale Secretary (no I didn't build it)

Or this simple yet absolutely 100% functional stool.

Always remember, beauty is in the eye of the beholder. Both the stool and the secretary are successes as they fulfill their intended purpose. To make either one requires planning, tools, wood and a wood worker. Either one requires a wood worker who is willing to try and fail, learn from the mistake and try again.
I ask you, how would one know if they succeeded if they have never failed. I am almost certain the person who built the secretary desk has made many mistakes and has learned from them. The simple stool may have been just as daunting a task to the person who built it as that secretary would be to me. (that stool is no cake walk either). I may never make enough mistakes in my lifetime to be confident in taking on a desk like that. But there is not a wood worker who would tell you that there is no use in trying. Take pride in what you are doing and you will have great results.
I'm climbing down from the soapbox now to get back to having some fun looking at my goof ups.
One may curse and throw the mistake in the firewood pile wasting all that time they spent getting to this point. I have enough firewood piled up outside. I may still toss in a curse though.
A foul up leads us to do something better than originally planned. Here I will show what so few of us ever put in a blog, our own mistakes. Too err is human, to really screw it up add tools.
Lets start with the corner posts. I was lacking material thick enough to make the corners from one board so I laminated three thinner pieces together like this. This is the end view of my test piece. The corners weren't chamfered until later.

Unfortunately the mitres on my corners did not come together so well. I wonder if that cave dweller had the same feeling as I when his stick burnt and the meat fell in the coals and ashes. Have a look at the edge below the mortise opening. Does it ever pay to be a pioneer?

A long time ago I would have used wood filler and got on with it. As I think about it I probably would not have tried that lamination at all. You feel able to try things outside of the norm as you become more confident in your ability to fix things.
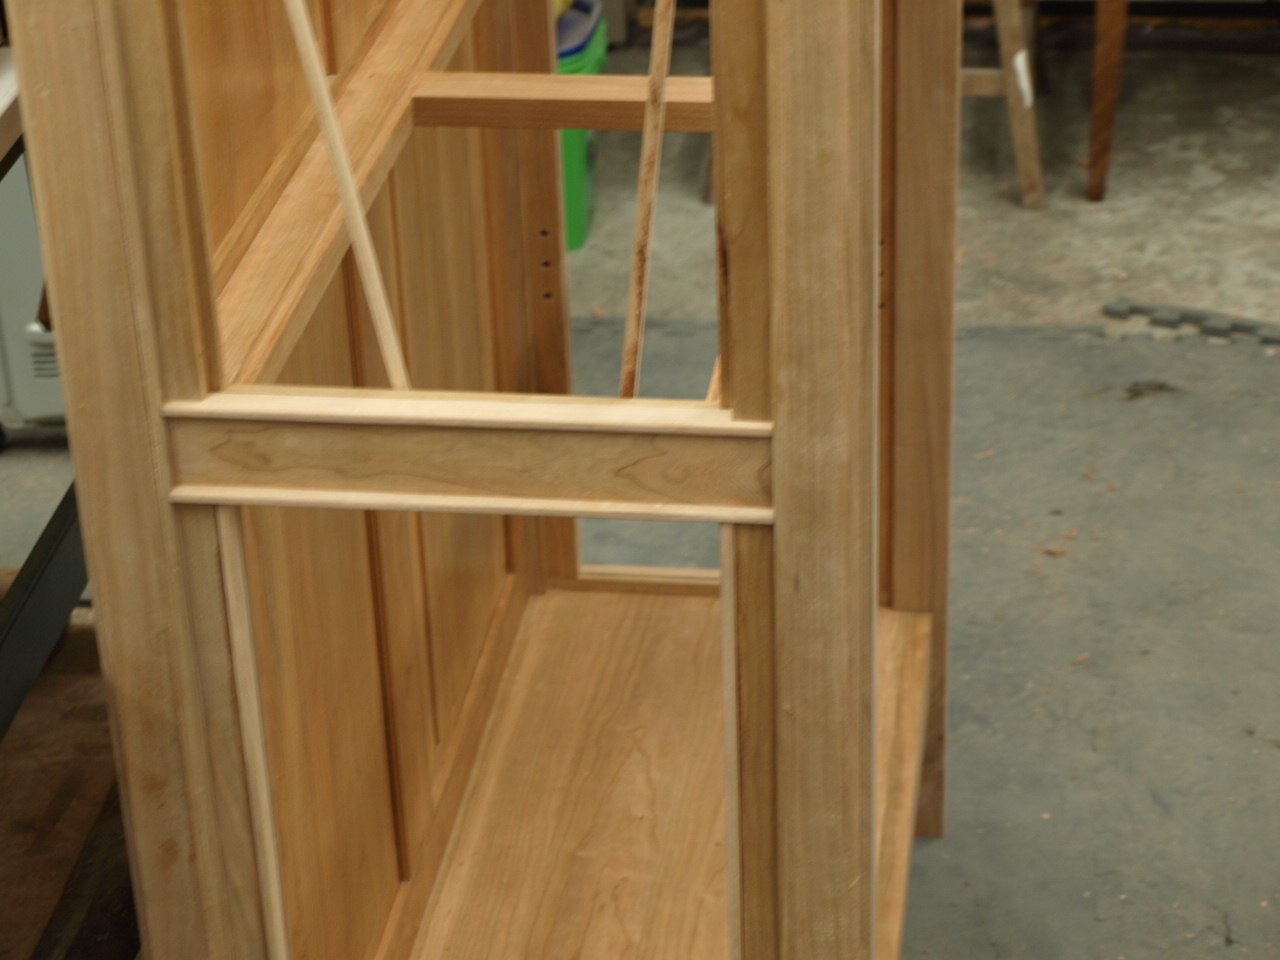
I figured out how I bungled this but lacking extra lumber I was forced to come up with a solution to this problem. Was it luck that I kept the cutoffs, or cosmic intervention. Whatever... I cut chamfers on the gaping corners and applied these multifaceted strips made from the angled cut offs which came from making the corner posts parts in the first place. After much smoothing with scrapers and planes the faceted strips were ready.

Here you can see the strips already applied to the corners. They make
for nice shadow lines and add some visual interest from the way the
light glances of the flats.

Looks alright. Scratch some beading on the inside of the corner where it meets the doors and voila. It's as if I planned it. I imagine the cave dweller pulling the meat from the ashes and telling everyone he just wanted the meat blackened cajun style.
Another design upgrade (that's what I call screw ups now) was the glazing rabbets. While cutting the rabbets on the table saw I cut on the edge then flipped to the face but forgot I raised the blade. Anyway the stopped ends of the rabbet were cut past the corners. More firewood ? Let's try something, nothing to lose if it's junk, right.
So I ripped them right through and ran the glazing stop the full length of the horizontal rails. Holy crap, it looks better this way.
I was feeling pretty smug about these until later in the project when I glued the faceted strips to the outside corners. Ya, that's right, now I can't get the blasted horizontal glazing strips in. Do I cut the strips in half and use some kind of something in between the halves? Awe shizzle. Let's just pry a strip off the one corner so I can sneak them in. And that is what I did. So be it.
Wow , writing this is akin to the dream where you find yourself at work and you don't have any pants on and you pray no one notices. Ever had that one? All these confessions have me feeling liberated. Cleansing the soul of the wood worker.
I am also happy that my wood stove was unable to get a taste of cherry this time. It does smell nice while burning though.
Surely my next project will go off without a hitch. Actually if it did it would probably look like it came out of a flat box with an allen key to put it together with.
Let us celebrate the mistake my fellow wood workers. May we boo boo with our heads held high. For it is one of the ways we come closer to wood working nirvana.
Seriously now, there are many ways to learn how to work wood better. If you are new to wood working be sure you know how your tools work and to use them safely. If you have to use excessive force on anything you are doing it wrong.
Planning is very important. A scale drawing will let you see if the proportions are right. If there is tricky joinery or bent lamination I use some full size drawings. This helps me find problems before hand. It's better to waste some pencil and eraser head than waste the wood.
Have patience. Don't force the wood through the tools, it will yield to them.
Thou shalt measure twice and cut once, tattoo that on the back of your hands.
Don't be intimidated by the work shown in some magazines. I used to think them snobbish until I realized I just wasn't ready yet. Read how they do things and take what you can. Accept that some things may be a little ahead of your ability. Walk first instead of running right away. A stroll is less painful than a forced march and you will reach your goals anyway. For myself, I would like to spend a year at some place like Rose Wood Studio or College of the Redwoods and really crank up some hand tool skills. But it won't happen any time soon. Well maybe a weekend session at Rose Wood. Just have to keep reading, watching, practicing.
Try and try again and if you still can't get it don't despair, seek out advice
Yes, advice..... advice is always available. Others are always willing to tell you how. Why just the other day I was working at a job site and I overheard a carpenter yelling to his apprentice , "Keep whacking yer wood Billy............it'll fit in there yet."
Just be sure you clearly understand what you are being told.
thanks for looking
Ken


