Wednesday 27 April 2011

Shoji Lamps II

  It's a nice spring morning so I'll take my coffee outside. Take the dog for a walk. Then into the shop to putter on the rice paper frames that fit into the lamps.

First up is a photo of some parts I was fitting together today for two lamps.

Frames to hold the rice paper shades
This happened a little later on. Best thing about hand tools is you can stop the blade before you do serious damage.

I'm experiencing a little vertigo....

When I showed it to my shop assistant Jack, he made a face like this.

Big Jack
 But it was worth it as the lamps are coming together like so.

Walnut Lamp
 Time to pickup some fixtures. I will put on the finish before assembly with a little touch up afterward. I'll post the finished product soon as they're done. Go Montreal Canadians Go.

Thanks for reading
Ken

Tuesday 26 April 2011

Shoji Lamps and the Knife Man

  An enjoyable Easter break, now back to some lamps (more wedding gifts) I started on last week. Sometimes it is so hard to get a project rolling. I no sooner began on the lamps last week when I remembered my cross cut sled needed some attention. I also decided to make two smaller cutting sleds for some upcoming boxes I have in mind.

  With those out of the way I turn my attention back to the lamps. As I apply my low angle block plane to wood it plays a sour note, huh ....., a little dull. Sharpening time ! On my way to the  sharpening station, those chisels I use regularly catch my eye. I bring them along. To my left are card scrapers laying on the bench since my last project, better not neglect them. Joint them with a file and burnish a perfect burr.

  All this sharpening reminds me of the Knife Man. Lets take a ride on the Way Back Machine. In my neighbourhood a man named Josepi with a big mustache (really, I'm not kidding) would walk the streets ringing a bell and pulling a cart with a sharpening station set up on it. On the side of his contraption was a hand lettered sign KNIFE MAN. It ran on human power by utilizing a foot treadle which spun the sharpening stones. The homemakers on the street would exit their domiciles (think June Cleaver) brandishing an array of kitchen knives and beckon him to their driveway and there he would go to work.
  Today our neighbor brought out four knives. Josepi would take a knife and with one eye closed he examined the edge, wiggled his mustache and let out an "uhh - huh". He then turned to either a stone that rode on a horizontal axle, or the other, that lay on its side and spun like a turntable. Sometimes he would use both, much to the delight of this little boy. After much scraping of steel on the stone and mustache wiggling he would finish by whipping the blade back and forth on a leather strope. Next his callused thumb would swing across the knife edge checking for sharpness. If all was good there was a wiggle of his mustache then a smile.
"Four knife'sa, one'a dolla, grattzi."

  Josepi also had a brother who worked out of a van and inside he would sharpen garden utensils, axes, saws............. Oh ya, I have lamps to build.

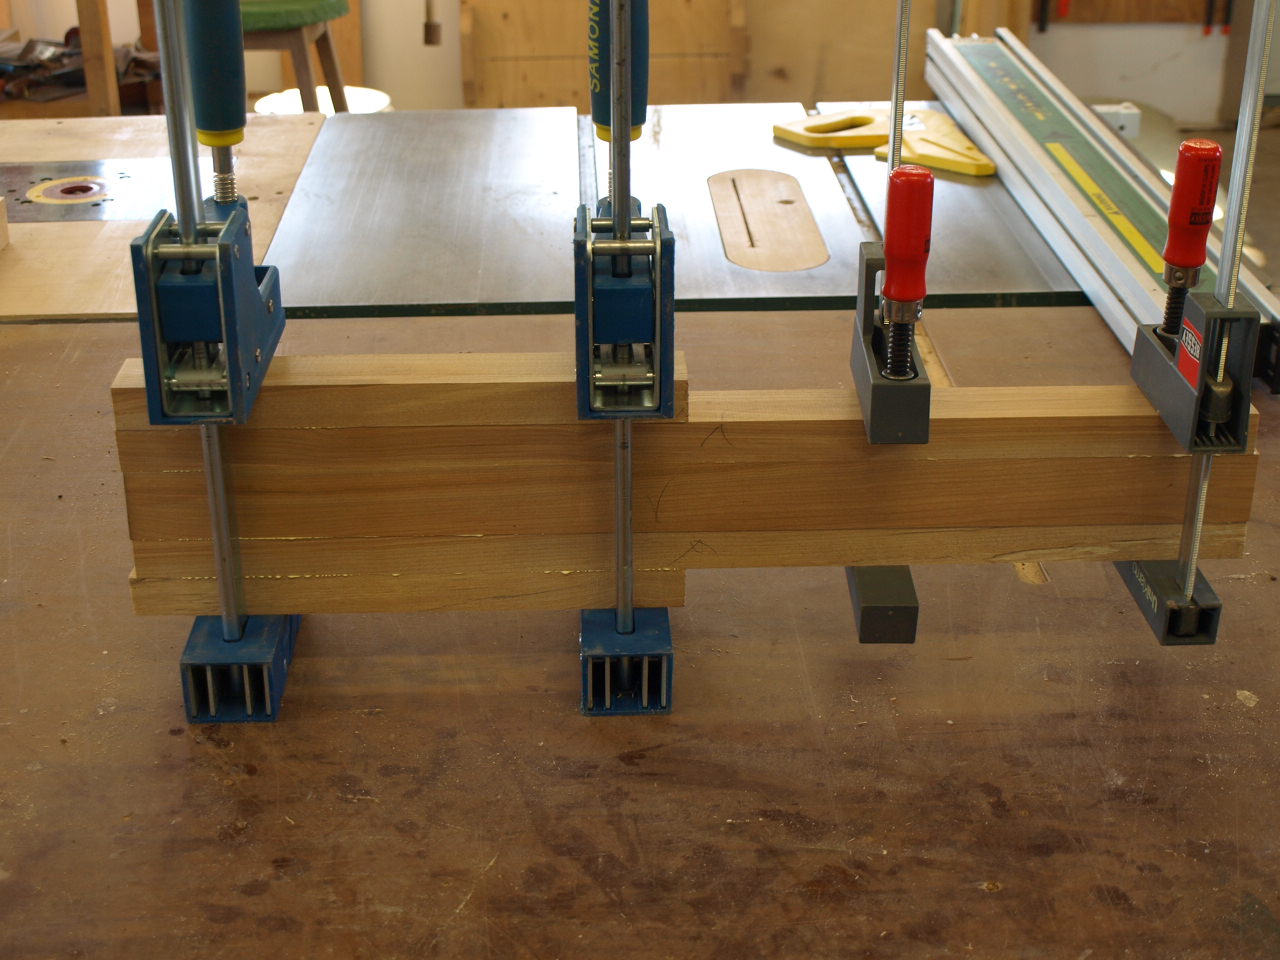
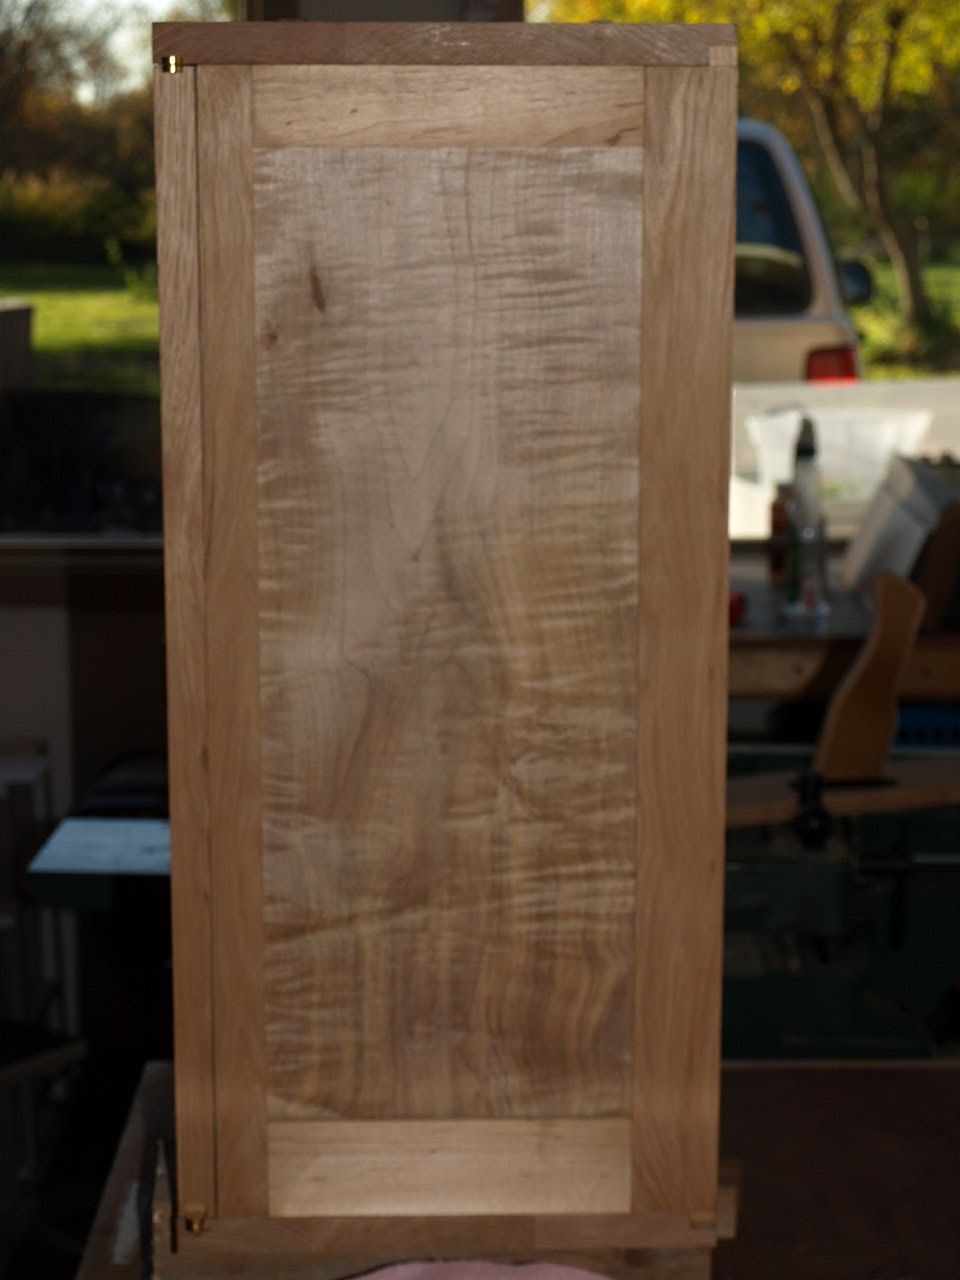
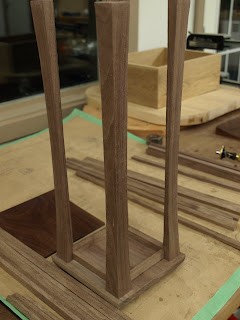
  My attention returns to the lamp parts, sawing, slicing curves, chopping rabbets, some boring, shaping and scraping. Things are moving along nicely, must not forget to enjoy the ride as they say. Here's some pics of parts in progress. I hope to post some more this week.

thanks for taking a ride with me.
Ken

Base for cherry lamp with feet.
 

This one is of walnut. Sides will be filled with rice paper.

Shaping a corner column on Frankenvise.

Friday 15 April 2011

Lee Valley Tools Ltd.

  Today I received a letter in the mail from Lee Valley Tools Ltd. To my suprise it contained a cheque made out to me and a letter informing me that a product I had recently purchased from their Scarborough store had since been reduced in price. I'm not sure if this would happen with all establishments but it certainly does at Lee Valley. As usual, always pleased with their commitment to the customer. Thanks Lee Valley.

Ken

Thursday 14 April 2011

Frankenvise

 When shaping cabriole legs it is nice to have a wide vise to hold the leg at each end. You can rotate the leg to work on shaping with spoke shave and files and it should be at a comfortable height. I decided to make a detachable leg vise that can open to about 20 inches and is about 44 inches above the floor at it's tip with a 5 1/2" wide jaw.

  I found some maple strips and laminated them up to make the jaws orienting the edge grain on the faces to combat flexing.


  A bolt and nuts used for heavy forming work along with some pieces of cast pipe tee and flanges make up the vise screw. A real bench screw would be best but I used what was on hand.


  Bolt the contraption to the work bench and voila, Ken's crazy leg vise.


Vise secured to bench with two Frankenstein neck bolts.

   I plan to have some long curved lamination coming up that will require lots of shaping with a spokeshave so I hope this device will work. I think it will require some adjustments and who knows, I might find a good vise screw somewhere in the future.

cheers

Ken

Wednesday 13 April 2011

Canada's Matthias Wandel

  I was looking at Matthias's web page today and I have to say WOW. Go yourself and check it out. Once there click on the woodworking link and enjoy.
  Also be sure to see the link about his father's sawmill and subsequent pages of his father's woodshop. A very enjoyable read.

thanks

 Ken

Wednesday 6 April 2011

Alexandra's Bed

  My daughter would possibly be leaving for college this fall and she asked if I could make her a nice bed frame. I asked her what she would like and she told me to make it like her lamp. I had made a lamp a while back of walnut and used Japanese rice paper for the shade and it turned out pretty nice. Being a prototype it naturally found a place in our house. (I plan to build another lamp soon and will post on this blog)

  I didn't have much time as I was scheduled for my surgery and wasn't sure if I could complete the bed afterwards. So out to the barn to check on the walnut pile and there I found what we would need.

  I figured I would follow the curves that were on the lamp for some inspiration. After some sketching I came up with a design that was a little to heavy and just to dark. I added some maple into the mix and went with a small center panel in the head and foot board flanked by maple pickets. Not bad. The legs were still too bulky and dark so I added some maple stringing inlayed to follow the outer shape of the legs. The mattress acutally sits on a wheeled steel frame so the bed frame does not hold any weight this allowed for a less robust set of rails. It will also make it easier for her to move to an apartment. I finished up with some wipe on poly.

  I had the bed together and in her room before I thought to take some shots of it. Oh well live and learn.

Darn blue dots on the wall, looks like Towmater.


First time I've used inlay in this way, it was interesting.

I hope you liked this post.  Thanks for looking
Ken

Time Passes Slowly

  "Time passes slowly"...., boy whoever said that was right. It seems like an eternity but only 5 weeks have passed since my surgery. A scary little piece of work called ACCF (click for info Anterior Cervical Corpectomy with Fusion). I was in a lot of pain but I am feeling much better now.

  The doctors still haven't cleared me to return to work and it will be a while yet. Feeling stronger each day. Will this allow working wood into my golden years?, time will tell.
 
  A bonus with woodworking is that it is a many faceted hobby. If I can't build I can talk about woodworking, look at what other woodworkers are doing, read about woodworking, look at woodworking tools, talk about woodworking tools, look at wood, imagine what I could create with that wood, listen to the wood, talk to the wood ............., did I already mention that time passes slowly? Allow me to regain some lucidity.....

  Maybe it would be a good time to make some small boxes with that cherry burl I have. Draw up some plans for that new lamp design rolling around in my head. I am not under any deadlines to complete anything, after all it's a hobby. Off to the workshop like a herd of turtles.

thanks for listening
Ken

Tuesday 5 April 2011

Corner Table and Bench for Office Entrance.

  In 2009 our family doctor had moved to an old house that was renovated into a new clinic. She likes to ensure items in the clinic are sourced locally. Fall was coming and so was flu season which necessitates a station in the entry way where persons can don a mask and wash their hands. The doctor also wanted a bench on which one could sit to remove their soggy footwear before entering the waiting room. The table had to be fairly large and fit into a corner. A three legged table would topple forward so I added a fourth in the center of the curved apron.

  I used soft maple for this project as they wanted the finish to be dark and the brown streaks in the wood wouldn't pose a problem when finishing. I also required strength for the seating bench.

Here it is, I didn't go for the fancy stuff. Adjustable feet were added.

  Since the bench was meant for removing your footwear I didn't go for a nice contoured fit. Many of the patients are elderly so I figured a flat seat and strong, easy to grab armrests were in order. The backrest is there so coats and mitts don't slide off the bench down in behind it. I have been in to visit and witnessed patients enjoying the bench while waiting for their ride home.

Bench is 48 inches long and I kept the seat height up so standing is a little easier.

Strong flat seat. Lower rail of backrest close to seat to keep items on top.

Easy to handle armrest that can take a load.

  I used Minwax English Chestnut stain then finished with 3 coats of Wipe on Poly.
One thing about the soft maple I found is that it can come up like little hairs when sanding so I used scraper cards. I prefer scrapers over sanding anyway.

Thanks, I hope you enjoyed this post.
 Ken

Iris Corner Table

  This small corner table offered the opportunity to try some bent lamination. The rail under the front edge of the top had to be curved but I did not like the end grain that would be there if I cut it from a thick piece of wood. The table is made from hard maple and has cherry strips laid into the front edge of the curved top and around the tapered legs near the top and bottom. I also applied some cherry banding to the bottom edge of the curved front, it helps to breakup the otherwise plain maple.


  This table was great practice for the next table I was to make for our family doctor's office.

As always thanks for looking
Ken

Monday 4 April 2011

Kelly's Cabinet inspired by Krenov

  My niece's wedding created the perfect opportunity for me to make a Krenov inspired cabinet. Unfortunately, slipped disks in my upper back left me with diminished strength in my left arm and hand along with burning nerve pain. I would rather roll in broken glass than experience nerve pain again.

  Kelly and her beloved man moved into their own home shortly after the wedding. As my nerve pain diminished I was able to start on the cabinet (now doubles as a housewarming gift). I took some figured soft maple and re sawed them into panels. The doors and cabinet frames are made from hickory. A stand for the cabinet was constructed from walnut. The cabinet was presented at the family dinner during the Christmas (2010) season. (wow, three gifts in one.)

Here are some pdf's with catches and other tricks made popular by James Krenov. www.finewoodworking.com/FWNPDF/011155044.pdf
www.finewoodworking.com/FWNPDF/011208084.pdf 

Here are some pictures of the cabinet.

Nice quilting

Rear panels are book matched and have some spalting.


The only decent pic showing the hand made door handles.

I need to work on my photography setups.


Lots of clamps to hold on the edge banding.


Spring loaded button catch to hold doors closed.

  It was a pleasure building this cabinet. Creating the design, matching wood, fabricating door catches, door handles, attention to grain direction, mixing different wood species and being mindful of it's overall symmetry. Give it a try some time.

thanks for looking
Ken


Saturday 2 April 2011

Tree Burl

  I was checking the fence lines at home the other day when I came across this Box Elder at the back of the pasture land. It known as Manitoba maple around here and is considered a weed. This one would be at least 20 years old and is covered in burl.

Burl runs up the tree about 8 feet.
  These trees often come down during bad storms that we have in the great lakes area so large ones in good condition aren't plentiful. I am not sure if it would hold up as a top for a table but I imagine it would be good for jewelry boxes or cabinet door panels. Turners use it for vases, bowls, plates and pen blanks.

The diameter of the trunk averages 25" where it is burled.
   There are signs that the tree is reaching the end of it's life higher up in the tree. I have seen other Manitoba's like this and it may be lost in it's current condition. We'll cut her down soon. Worth a look anyway.


The bark has many of these swirled buds on it. Is this a sign of birdseye?
(click on the pic for a closeup)

  If anyone has any thoughts on what this tree might contain drop me a line. As always thanks  for looking

Ken